How to Add Sections?
Overview:
After creating a form, the first step is to add the sections to it. Furthermore, users can add groups, sub-sections and fields to this section.
Step 1: How to create Sections?
Note: To create a new form, follow How to Create a Form and then follow this article to add the sections to it.
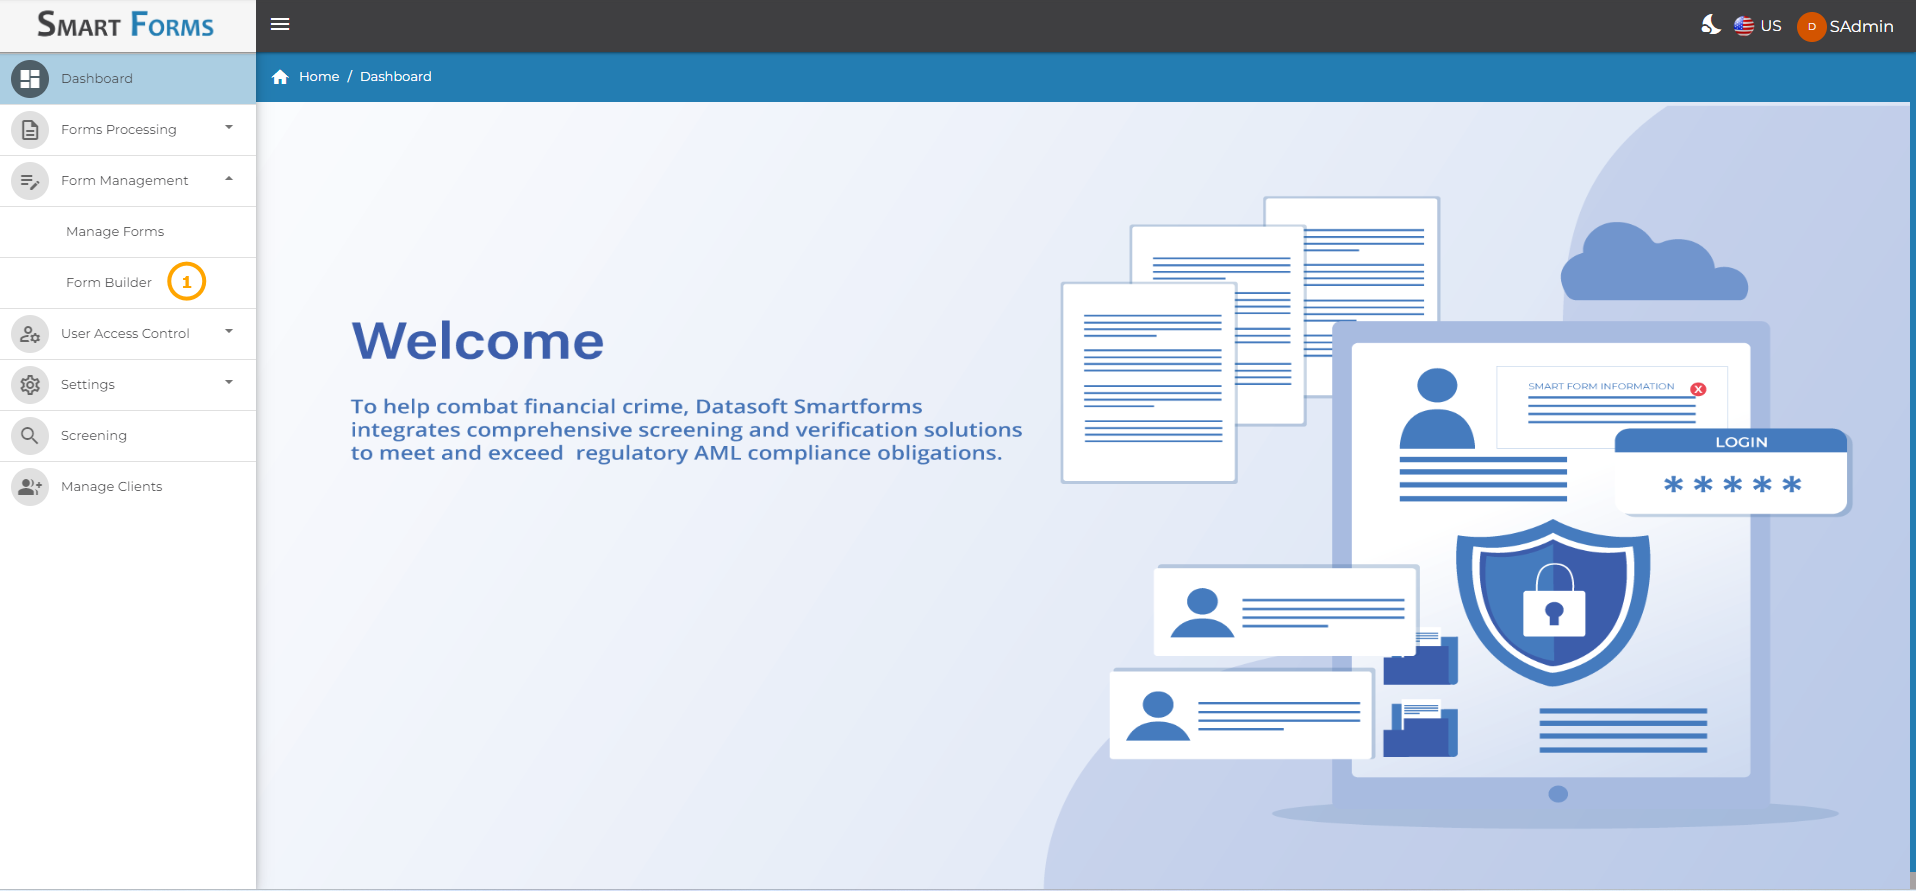
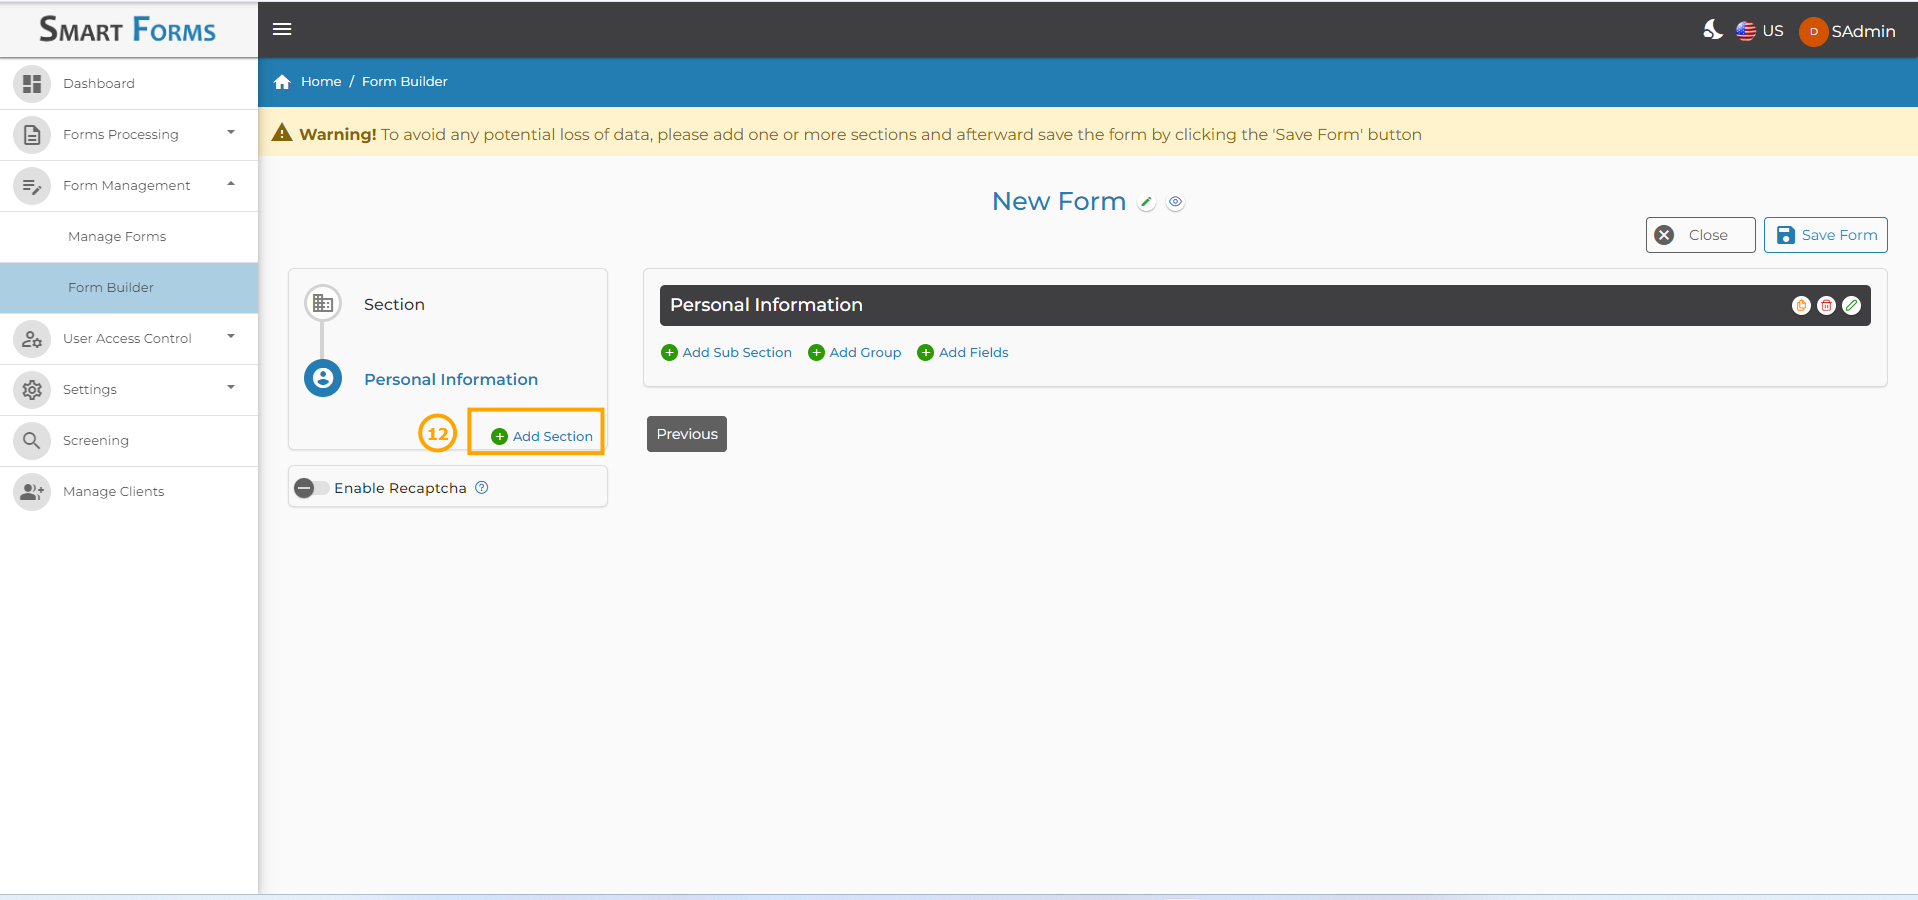
1.To add sections to an existing form, navigate to the Form Builder from the side menu.
- Click on the edit icon present against the respective form if you want to make any changes.

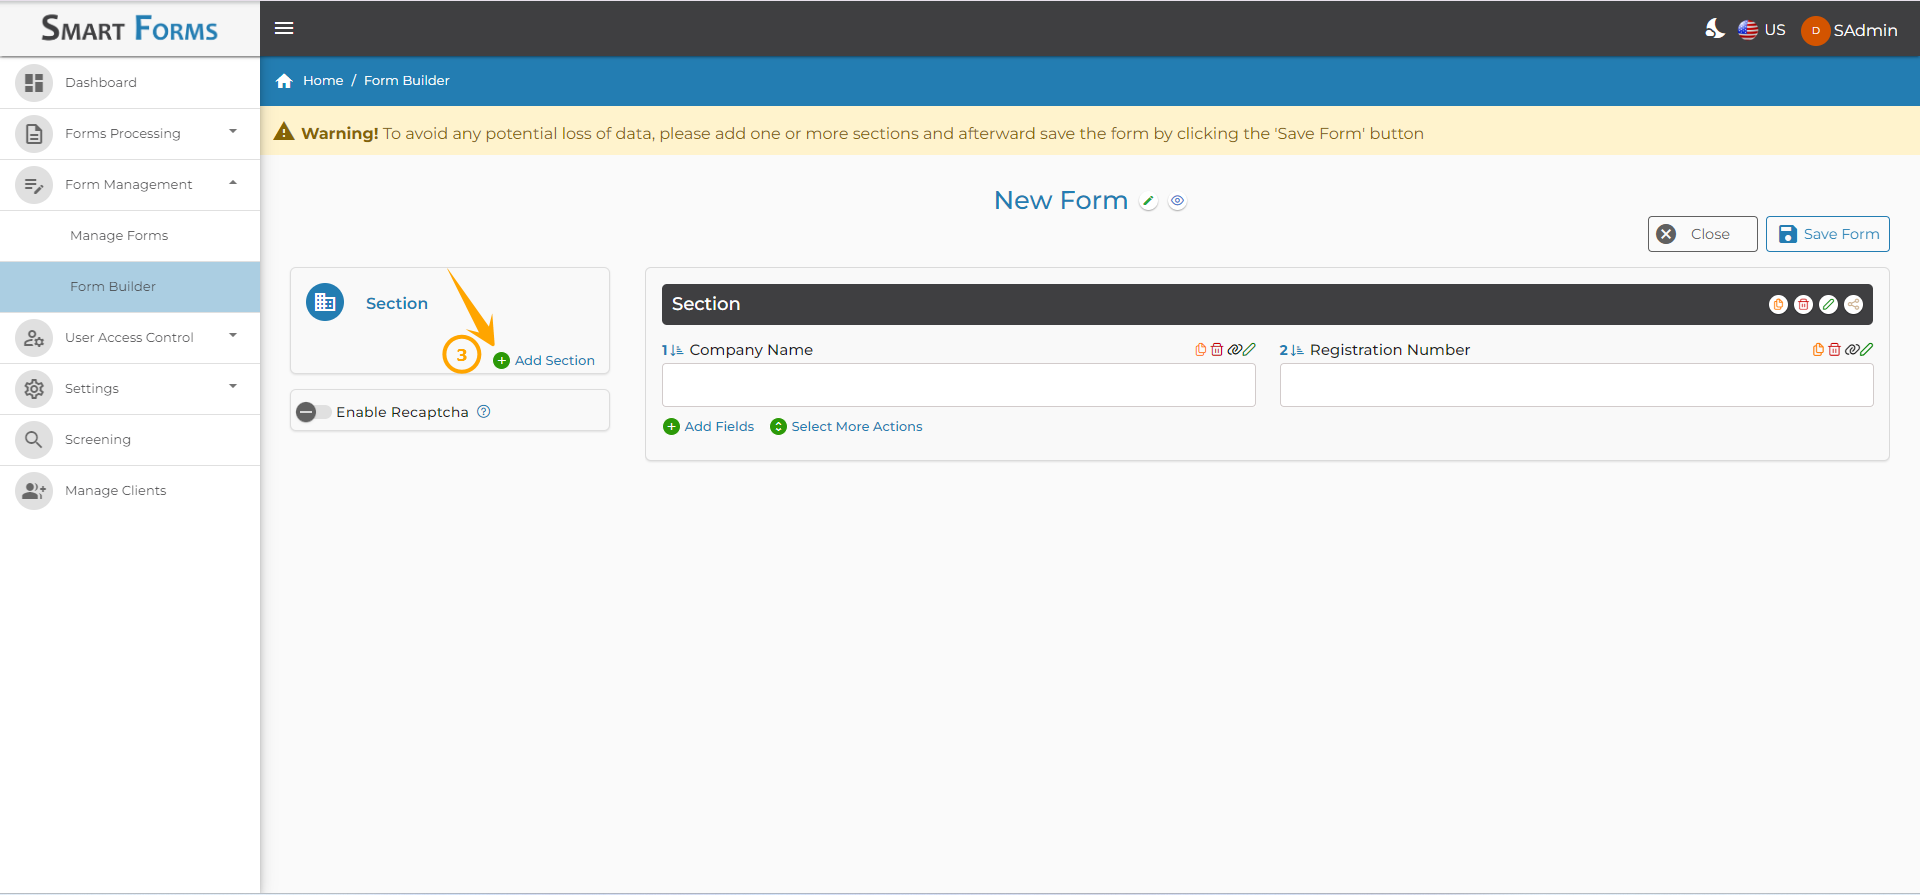
- Click on the Add Section button. Here we are adding the sections: Personal Details, Address Details and Terms & Conditions to our Personal Account Application Form.
-
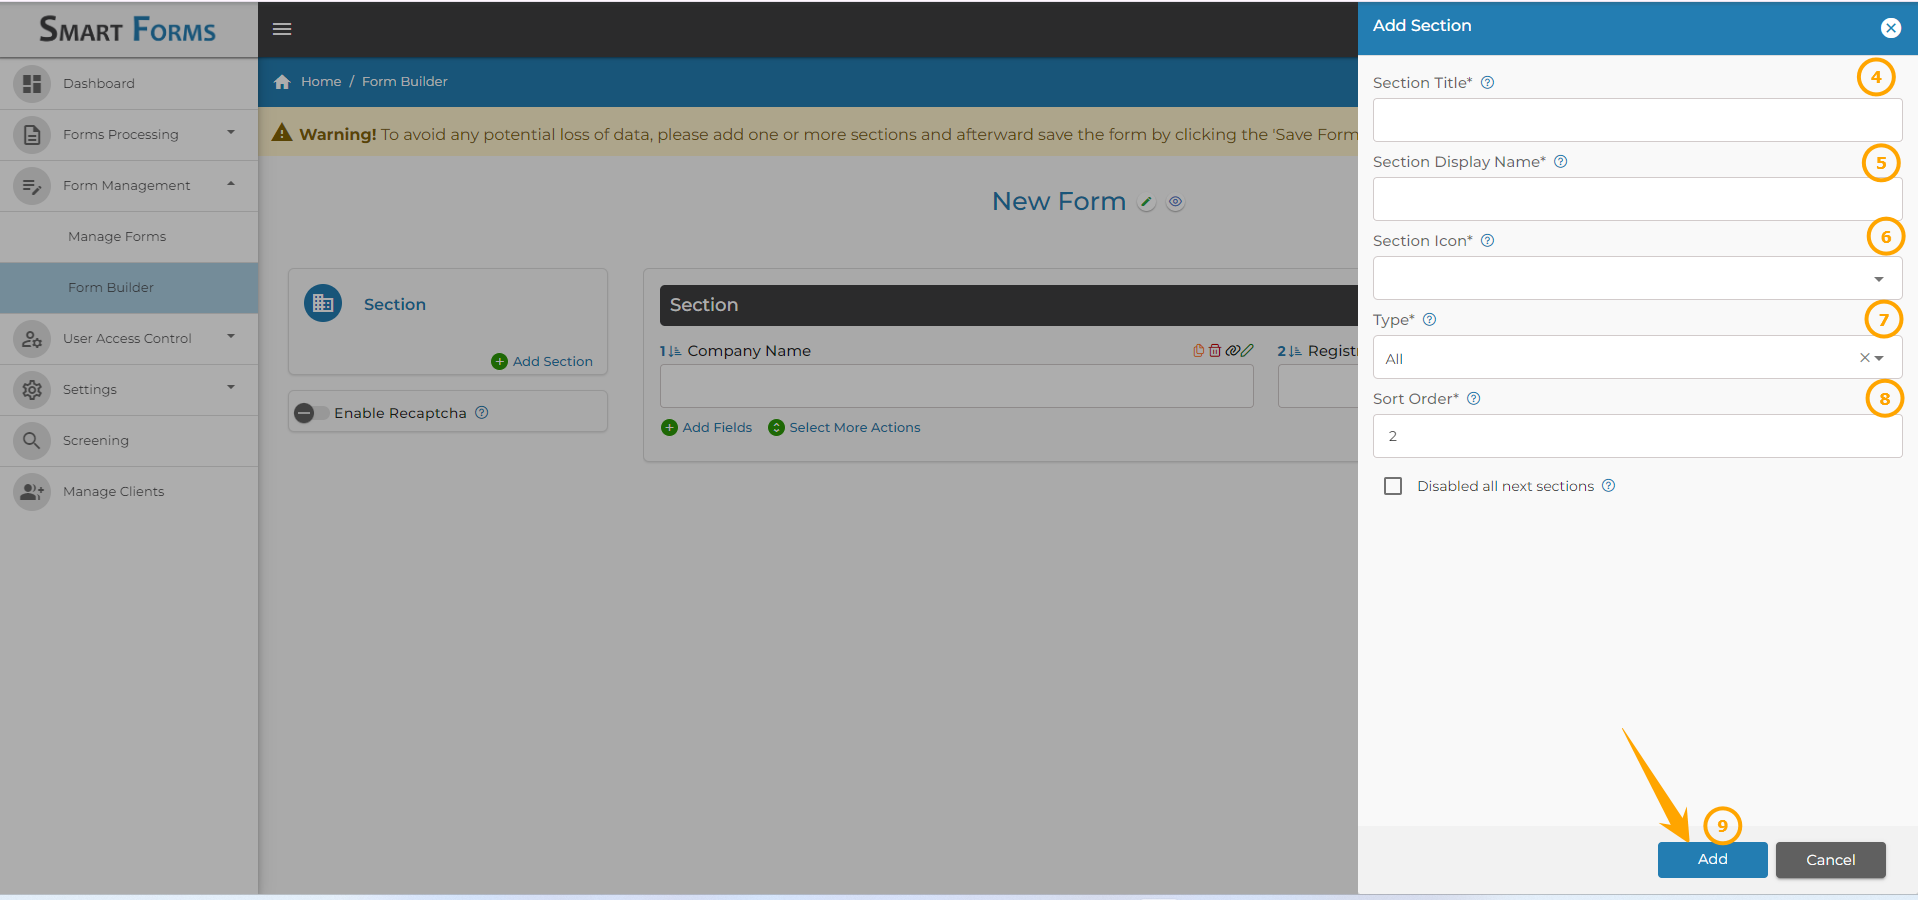
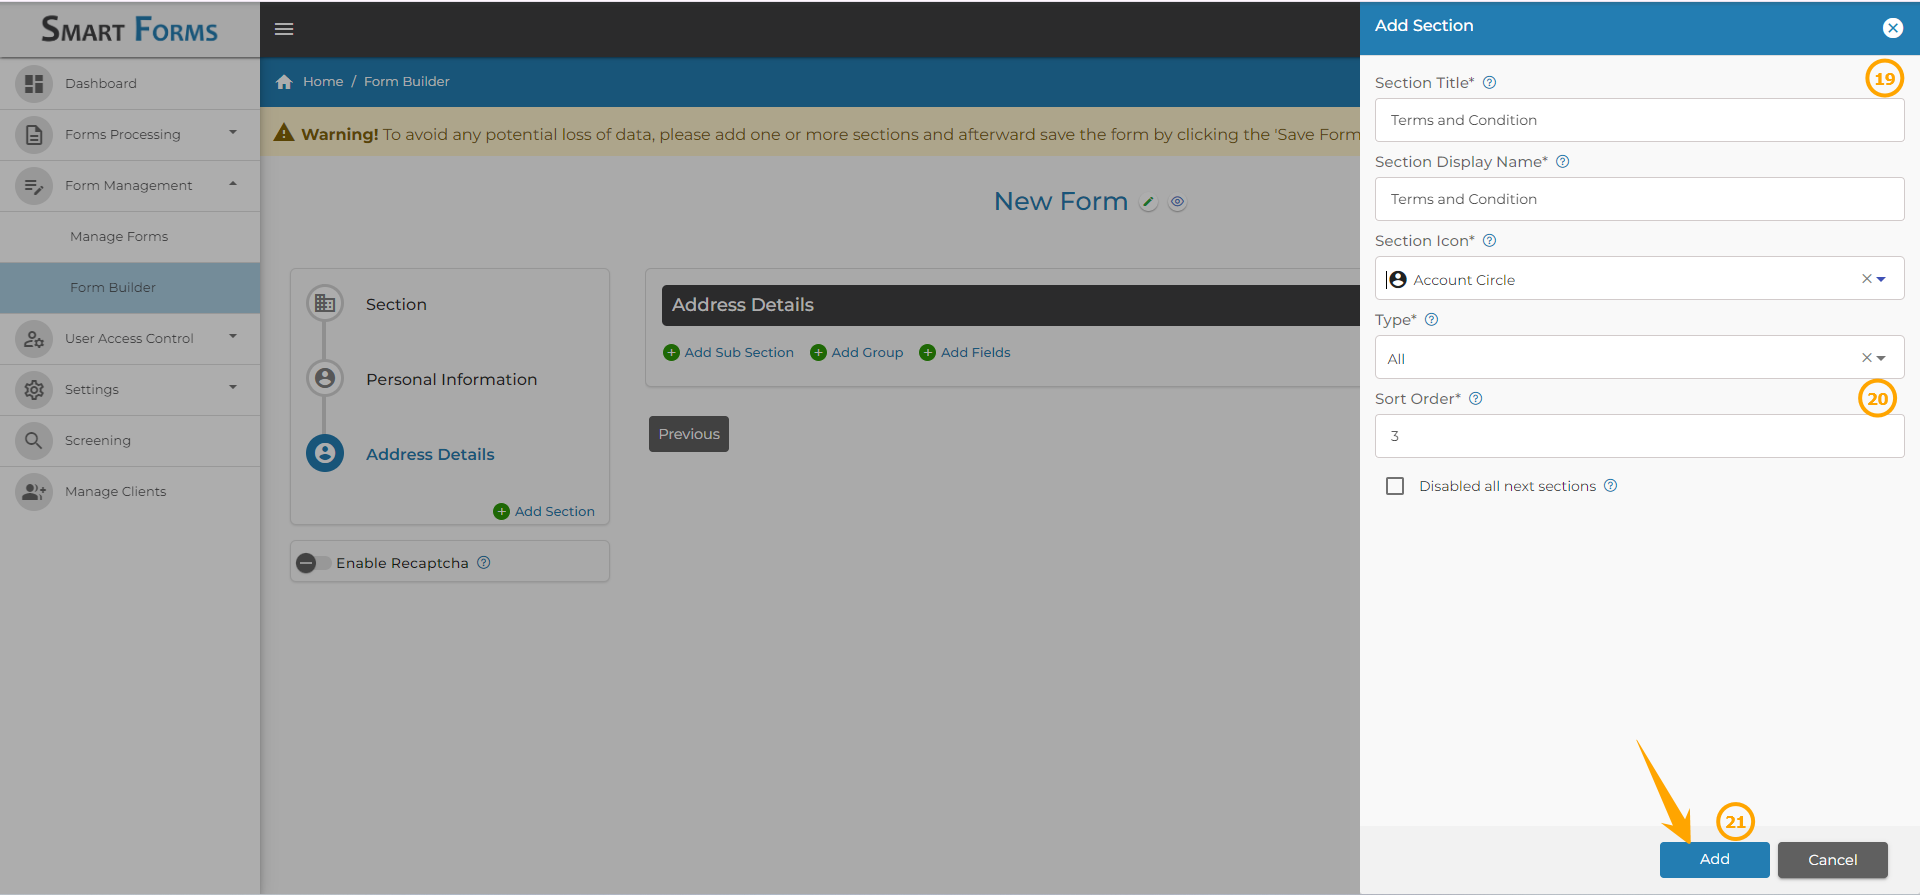
Enter the Section Title.
-
Enter the Section Display Name, you can keep the section display name the same as the section title.
-
Select the appropriate Section Icon from the drop-down menu.
-
Select the Type from the drop-down menu, this decides the visibility of the section:
a.All: This section will be visible in the form that is to be filled by the applicant, the form received by the admin/compliance team, and the received form which is sent as a PDF via email.
b.Only Internal:This section will only be visible in the form received by the admin/compliance team.
c. Only External: This section will be only visible in the form that is to be filled by the applicant.
d. Only PDF: This section will be only visible when the form is sent as a PDF via email.
e. Exclude Internal: This section will be visible in the applicant’s form, and the received form which is sent as a PDF via email.
f. Exclude External: This section will be visible in the form received by the admin/compliance team, and the form which is sent as a PDF via email.
g. Exclude PDF: This section will only be visible in the applicant’s form and the form received by the admin/compliance team.
h. None: This section will not be visible in any from anywhere but can be used for database mapping.
-
The Sort Order will be auto-populated as 1 since it is the first sub-section.
-
Click the Add button.
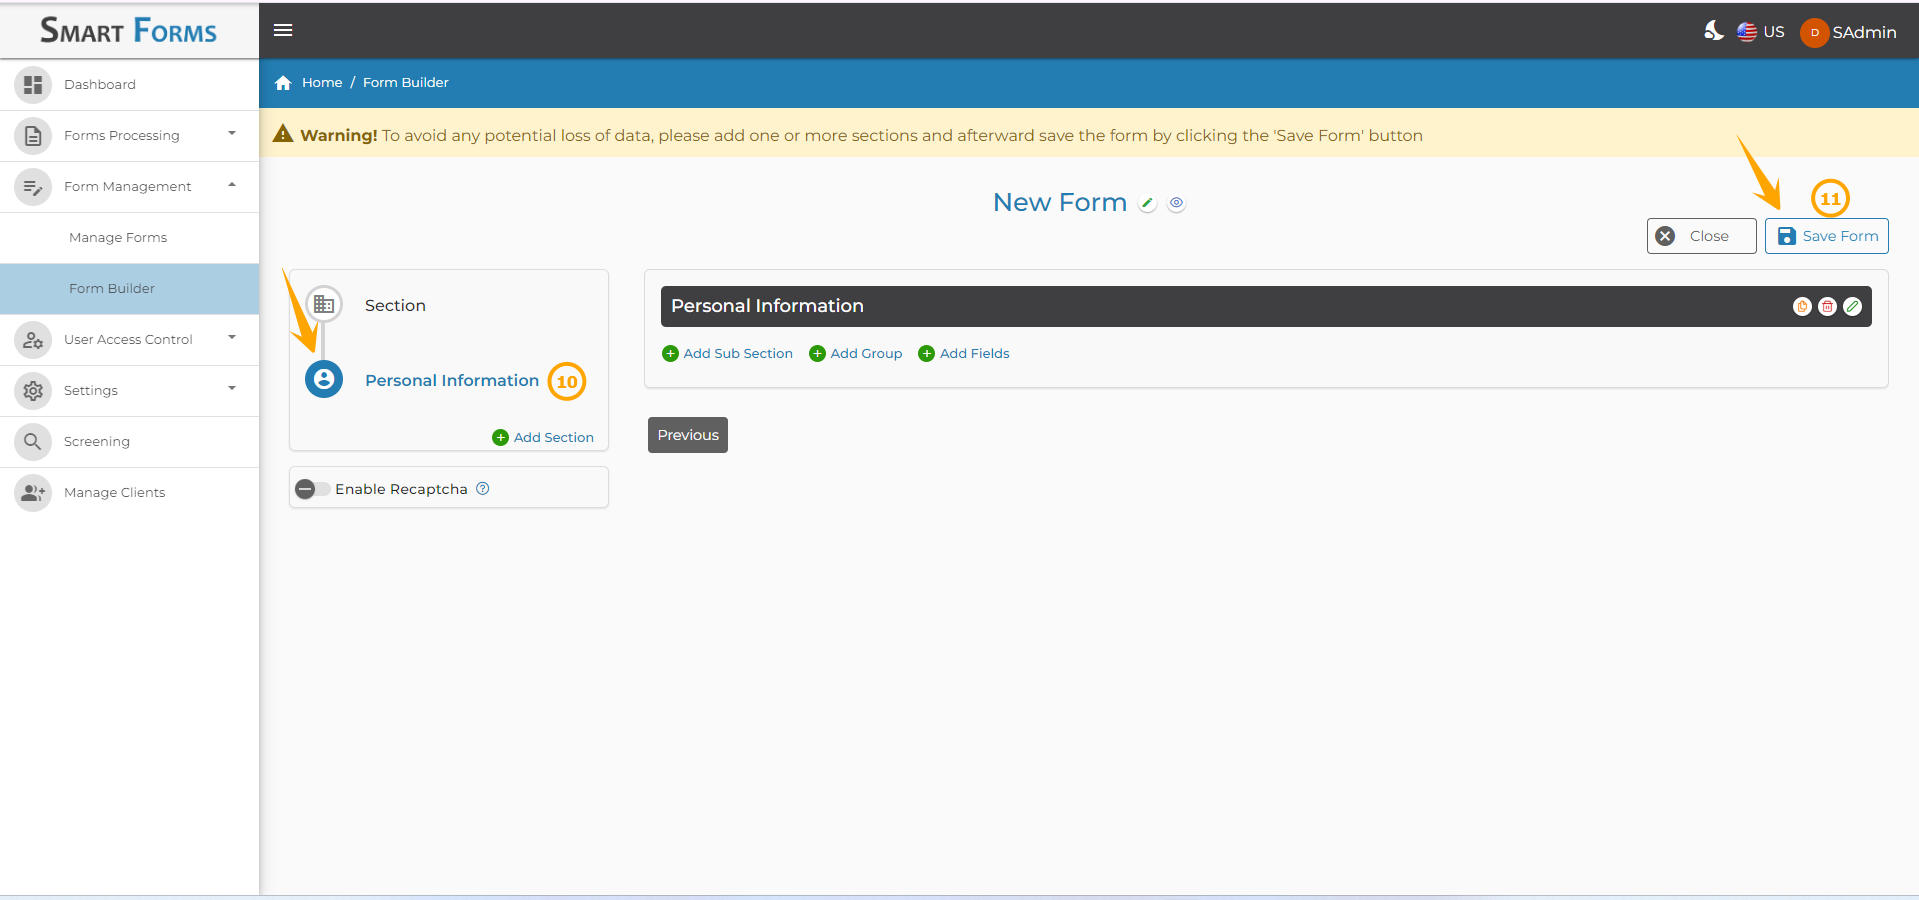
10: The section has been added to the form.
11: Click the Save Form button to save the changes.
How to Add More Sections?
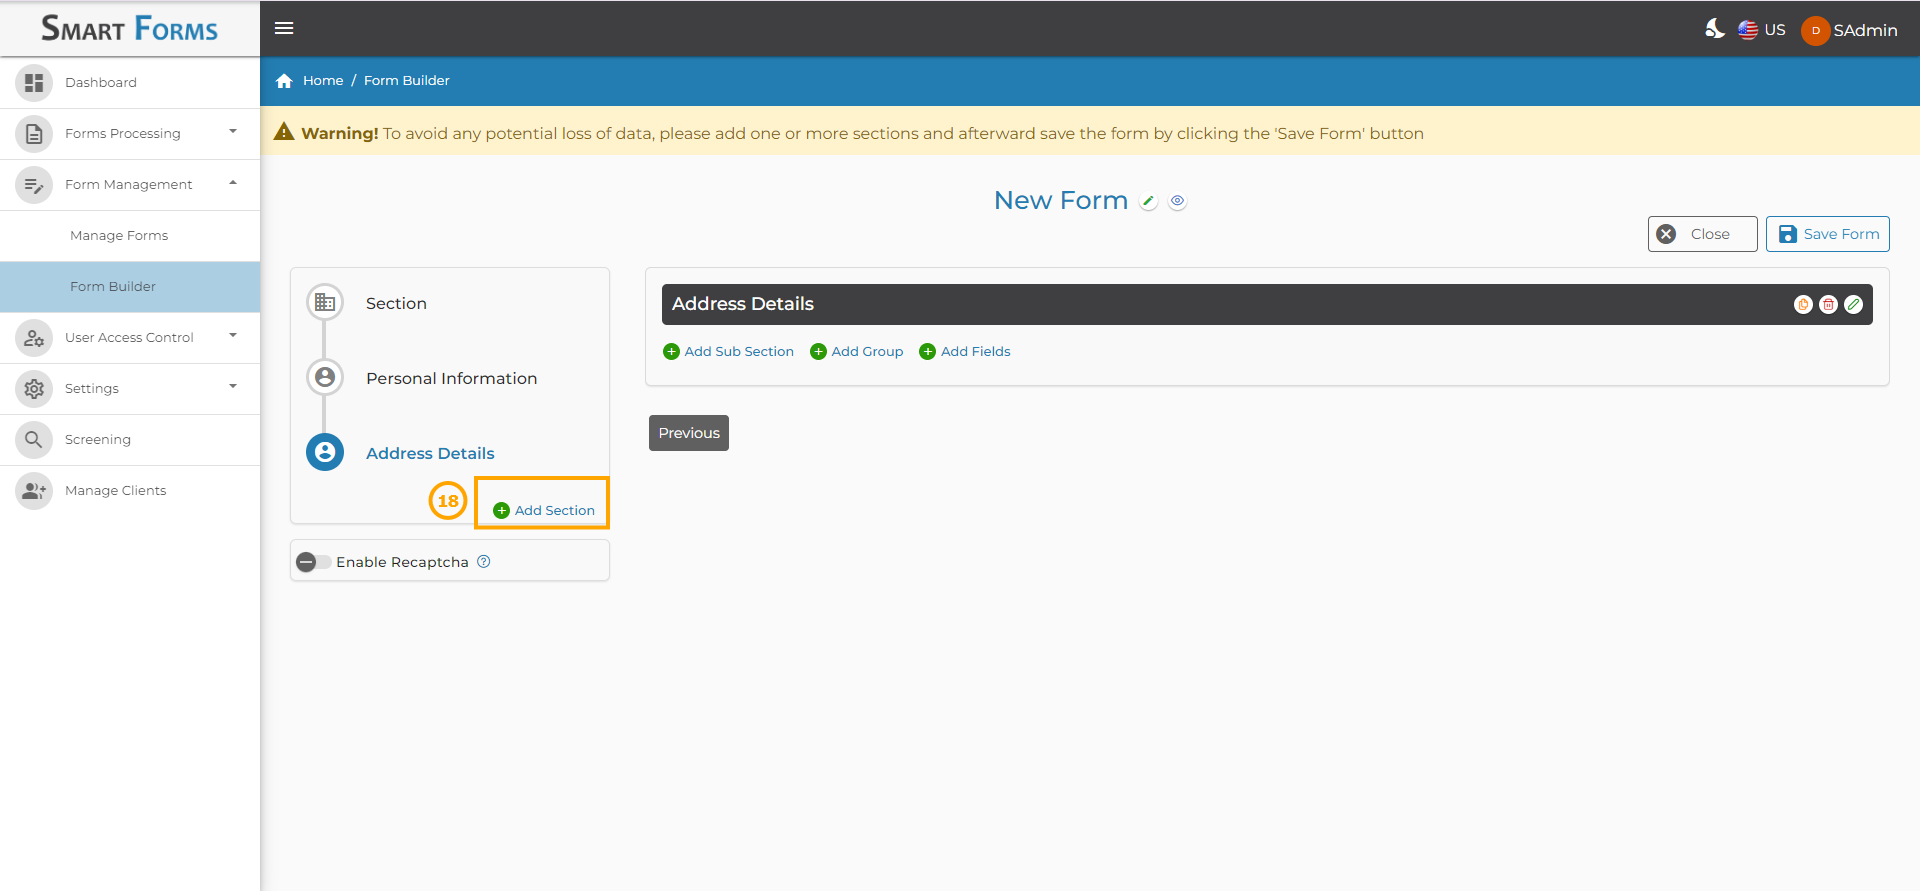
- To add another section, click on the Add Section button under the first section.
-
Follow the same steps as above to add the section.
-
The Sort Order will be auto-populated as 2 since it is the second sub-section but you can change it to the preferred order. You can update the sort order as 1 if you want this section to appear as the first section.
-
Click the Add button.

-
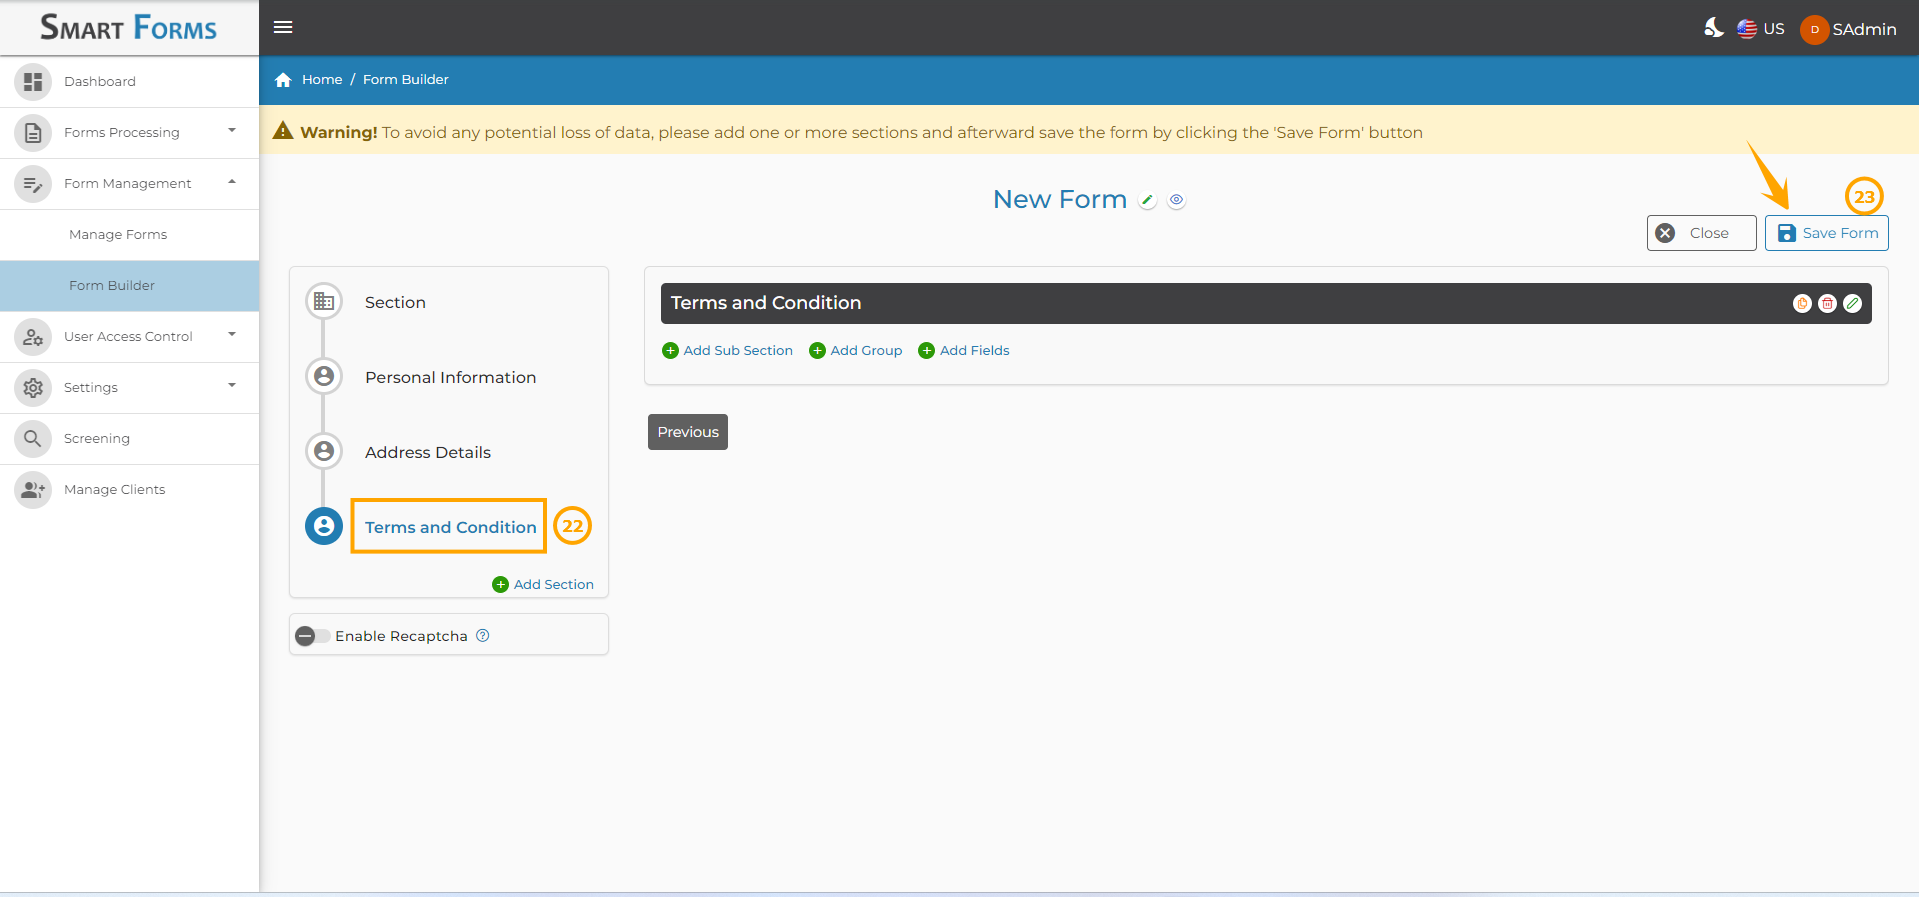
The second section has been added.
-
Click the Save Form button again to save the changes.

- To add the third section under Address Details, click the Add Section.
-
Follow the same steps as above to add the section.
-
The sort order will be auto-populated as 3 since it is the third section, but the user can change it to the preferred order. Users can update the sort order as 1 or 2 if they want this section to appear as the first or second section.
-
Click the Add button.
-
The third section has been added.
-
Click the Save Form button.
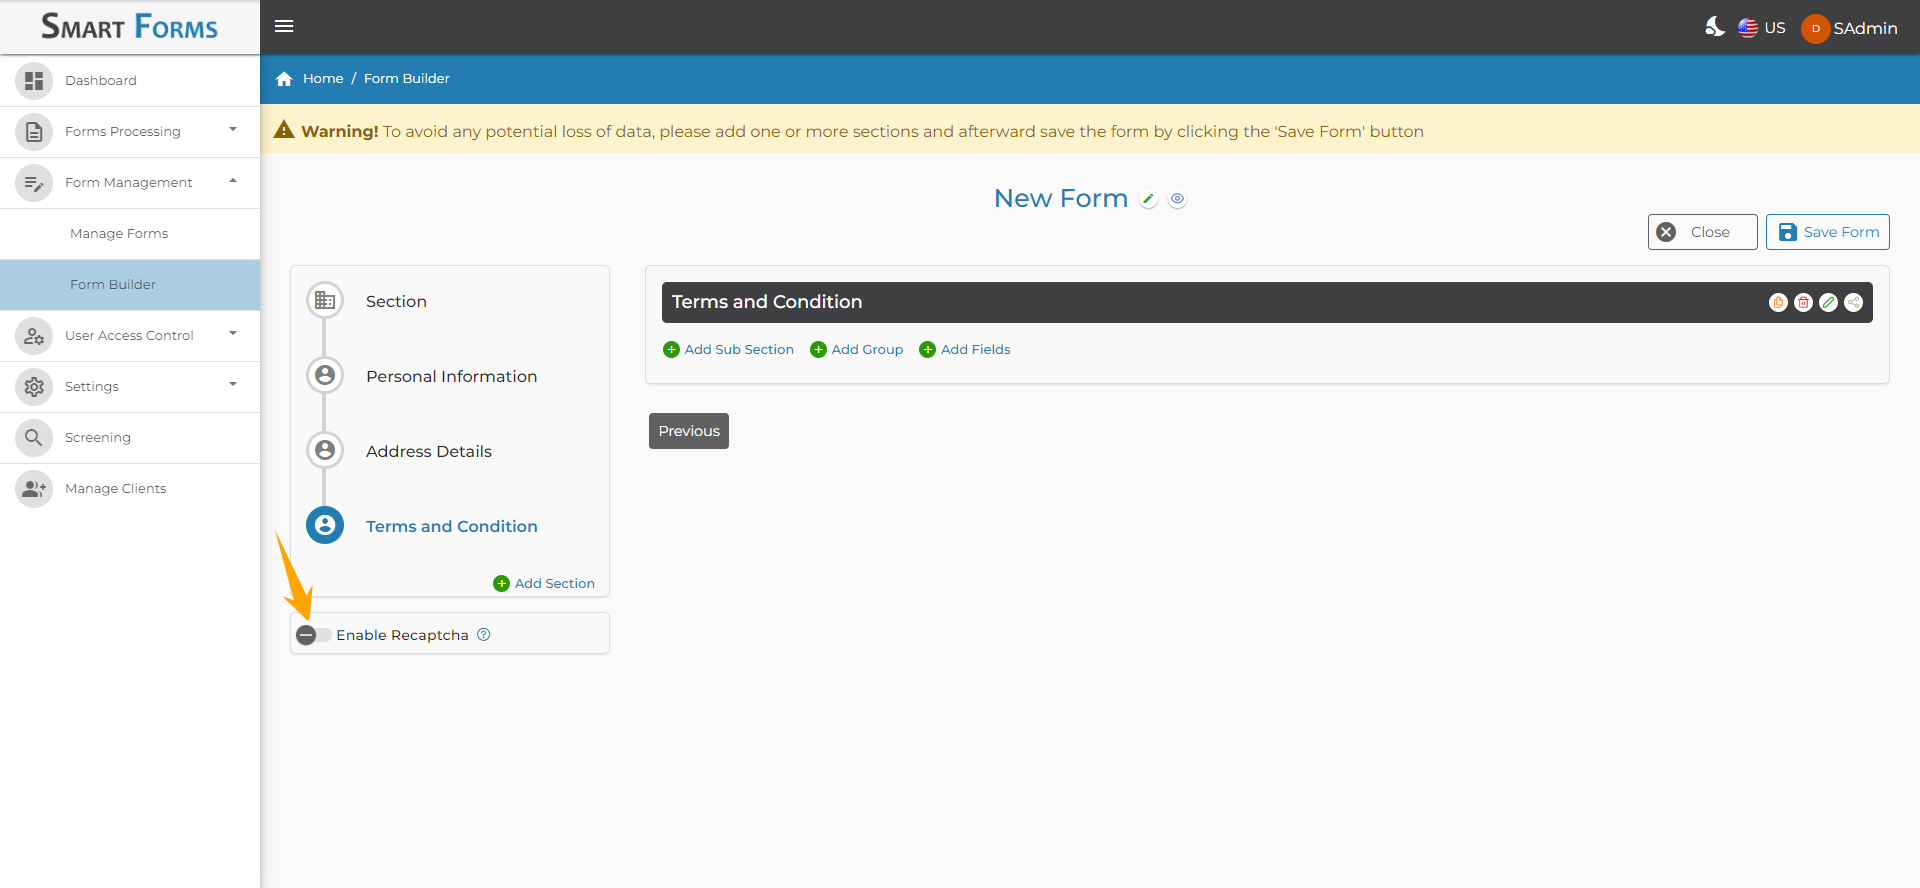
Enable Recaptcha: To implement human verification, enable Recaptcha. This ensures users complete validation before submitting the form.
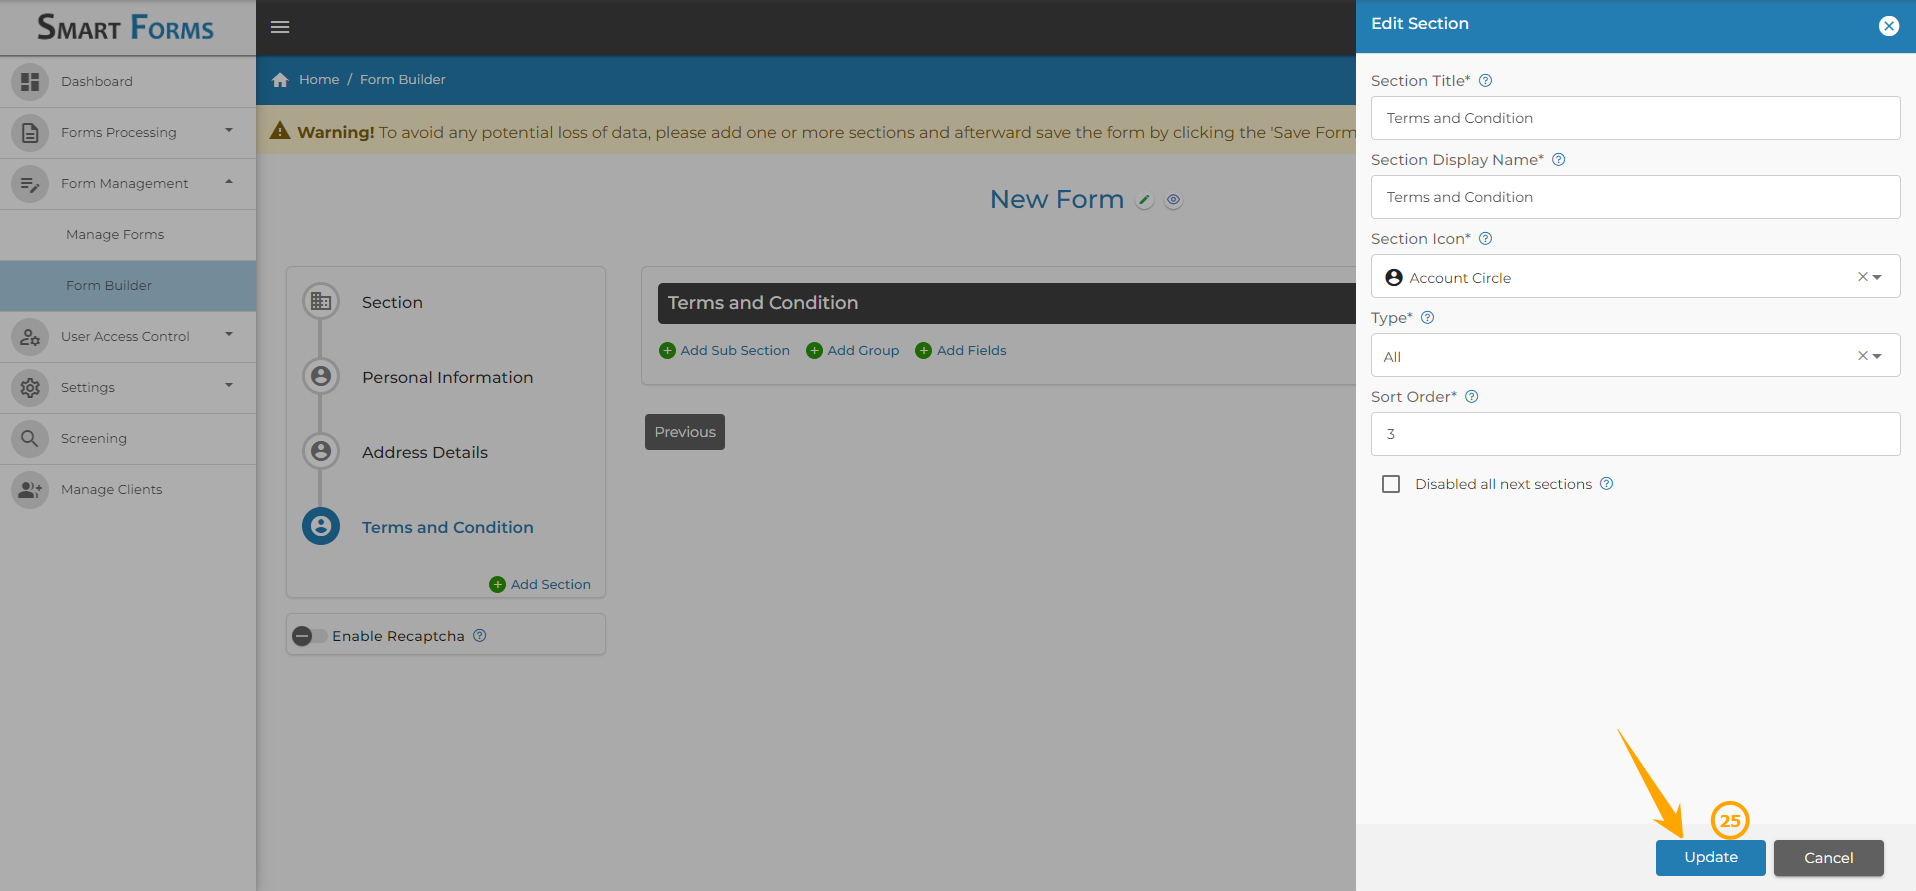
How to Edit the Section?
24: The user can edit the section by clicking on the Edit icon.

25: The edit section window will then be opened where the user can make the preferred changes and click the Edit button to save the changes.
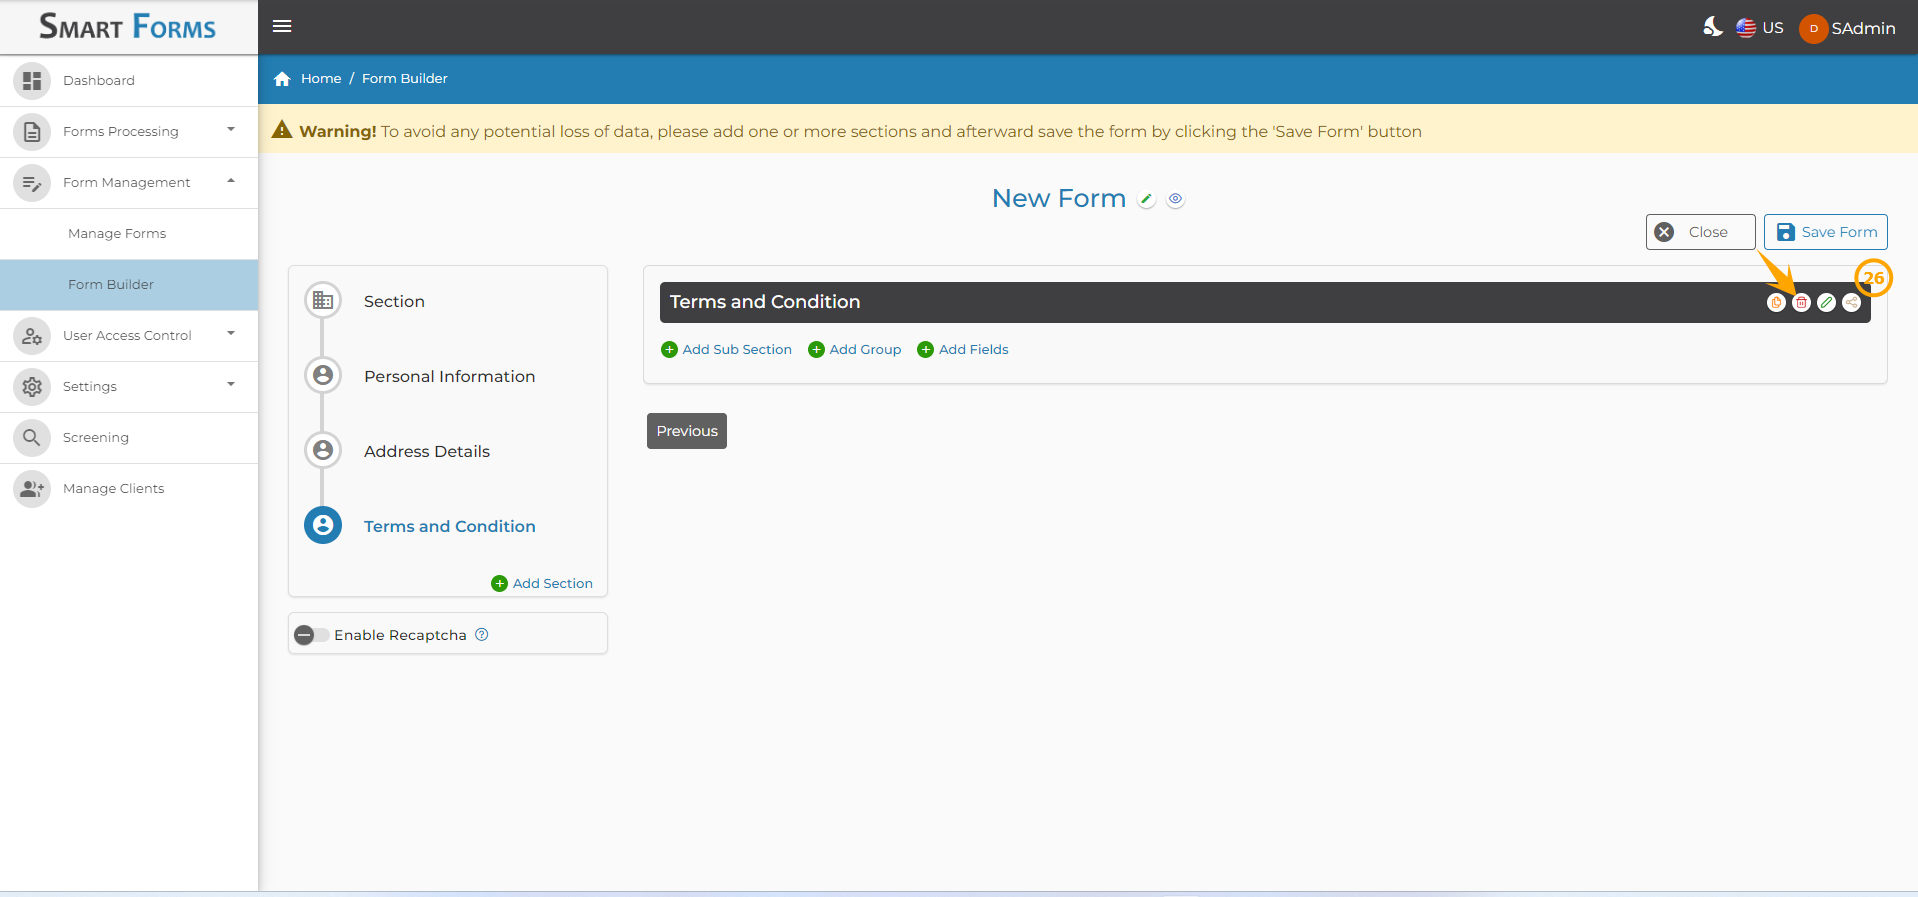
How to Delete the Section?
26: The user can delete the section by clicking on the Delete icon.
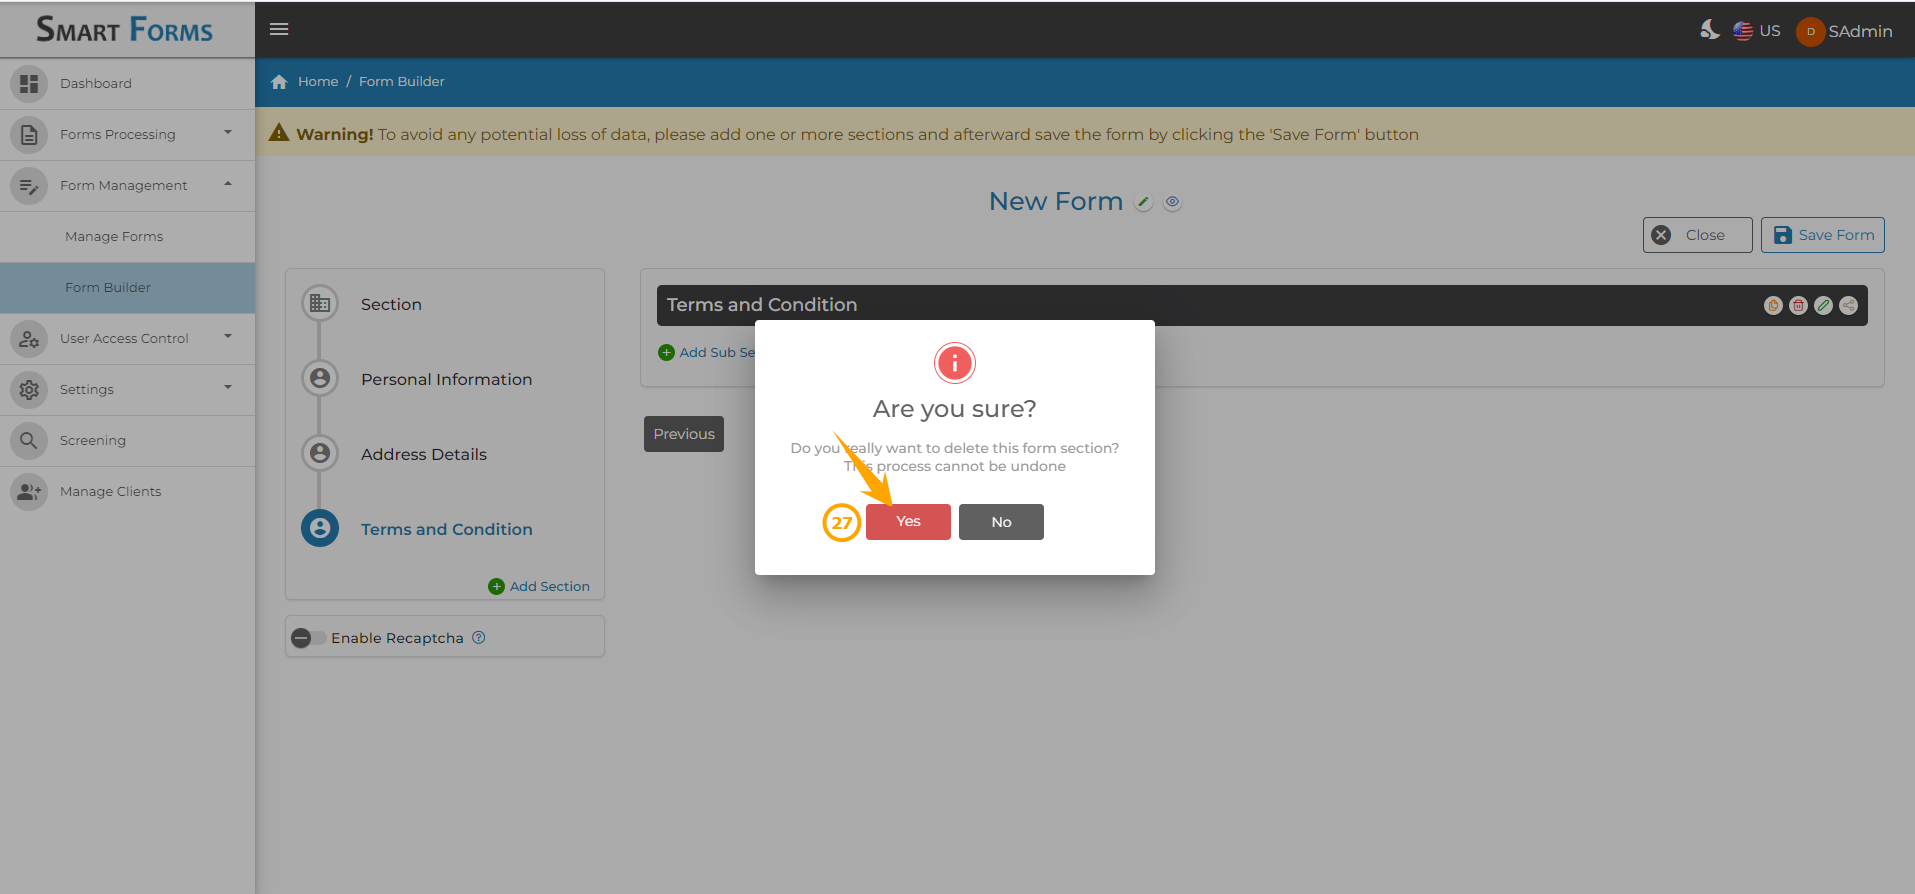
27: A confirmation pop-up window will be opened. Click on Yes to confirm deleting the section.
How to Copy the Section?
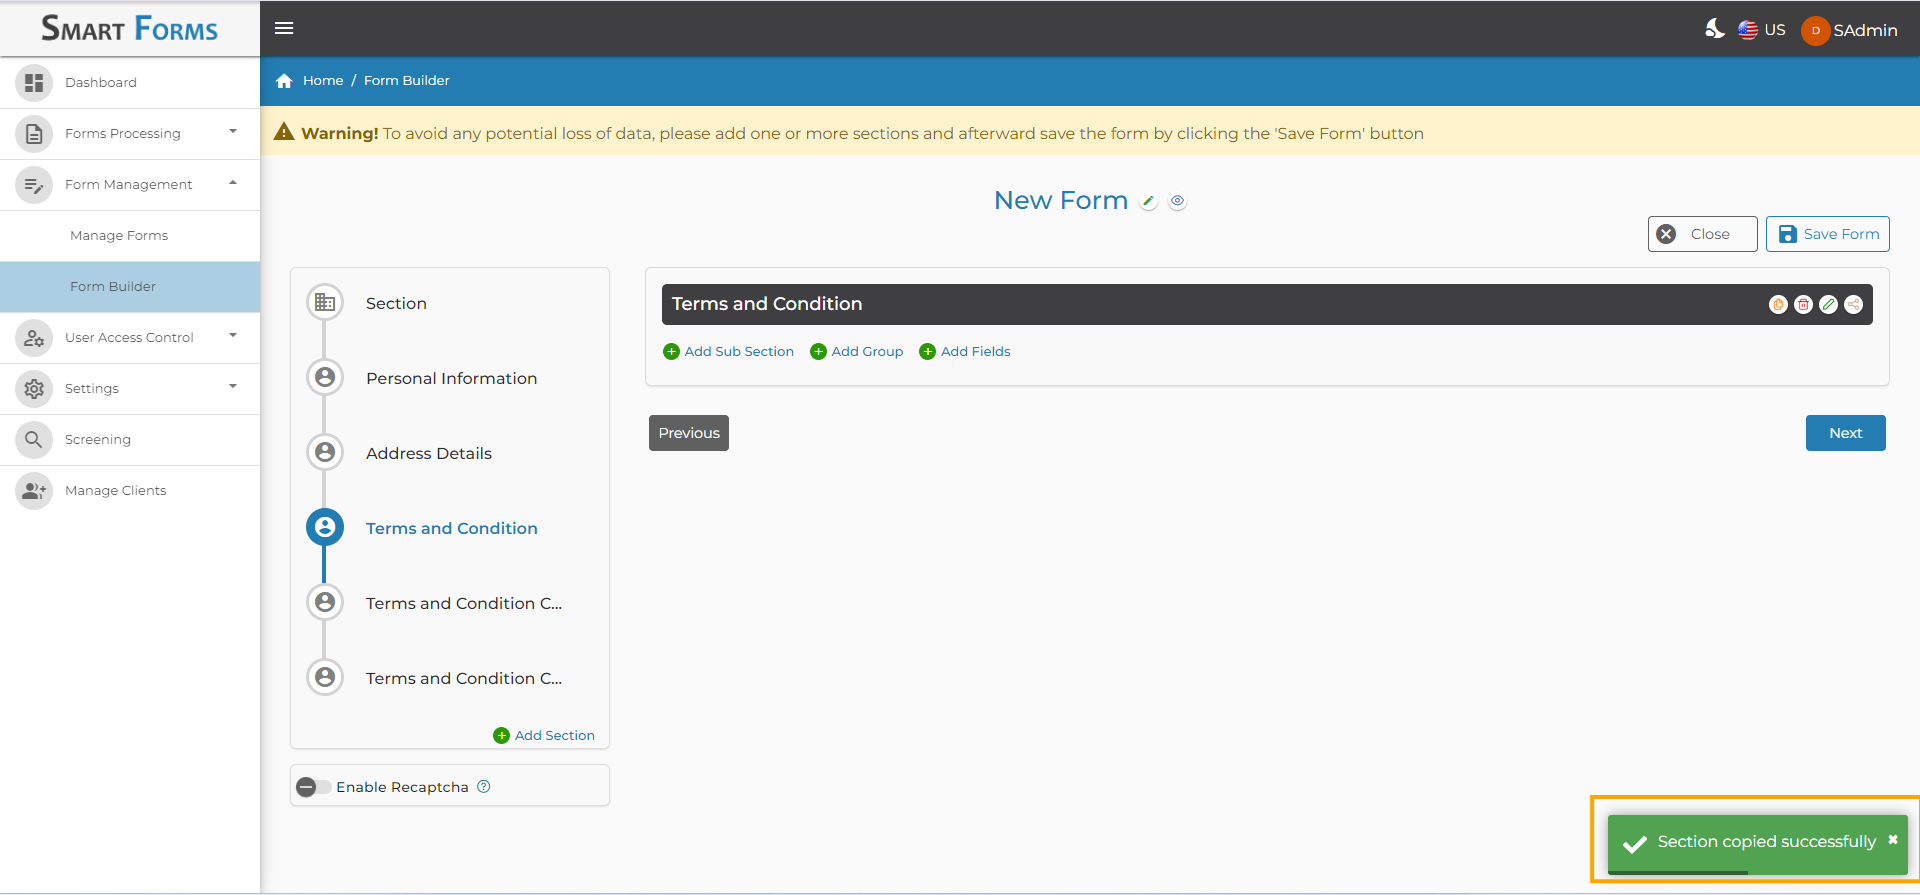
28: The user can copy the section by clicking on the Copy icon.
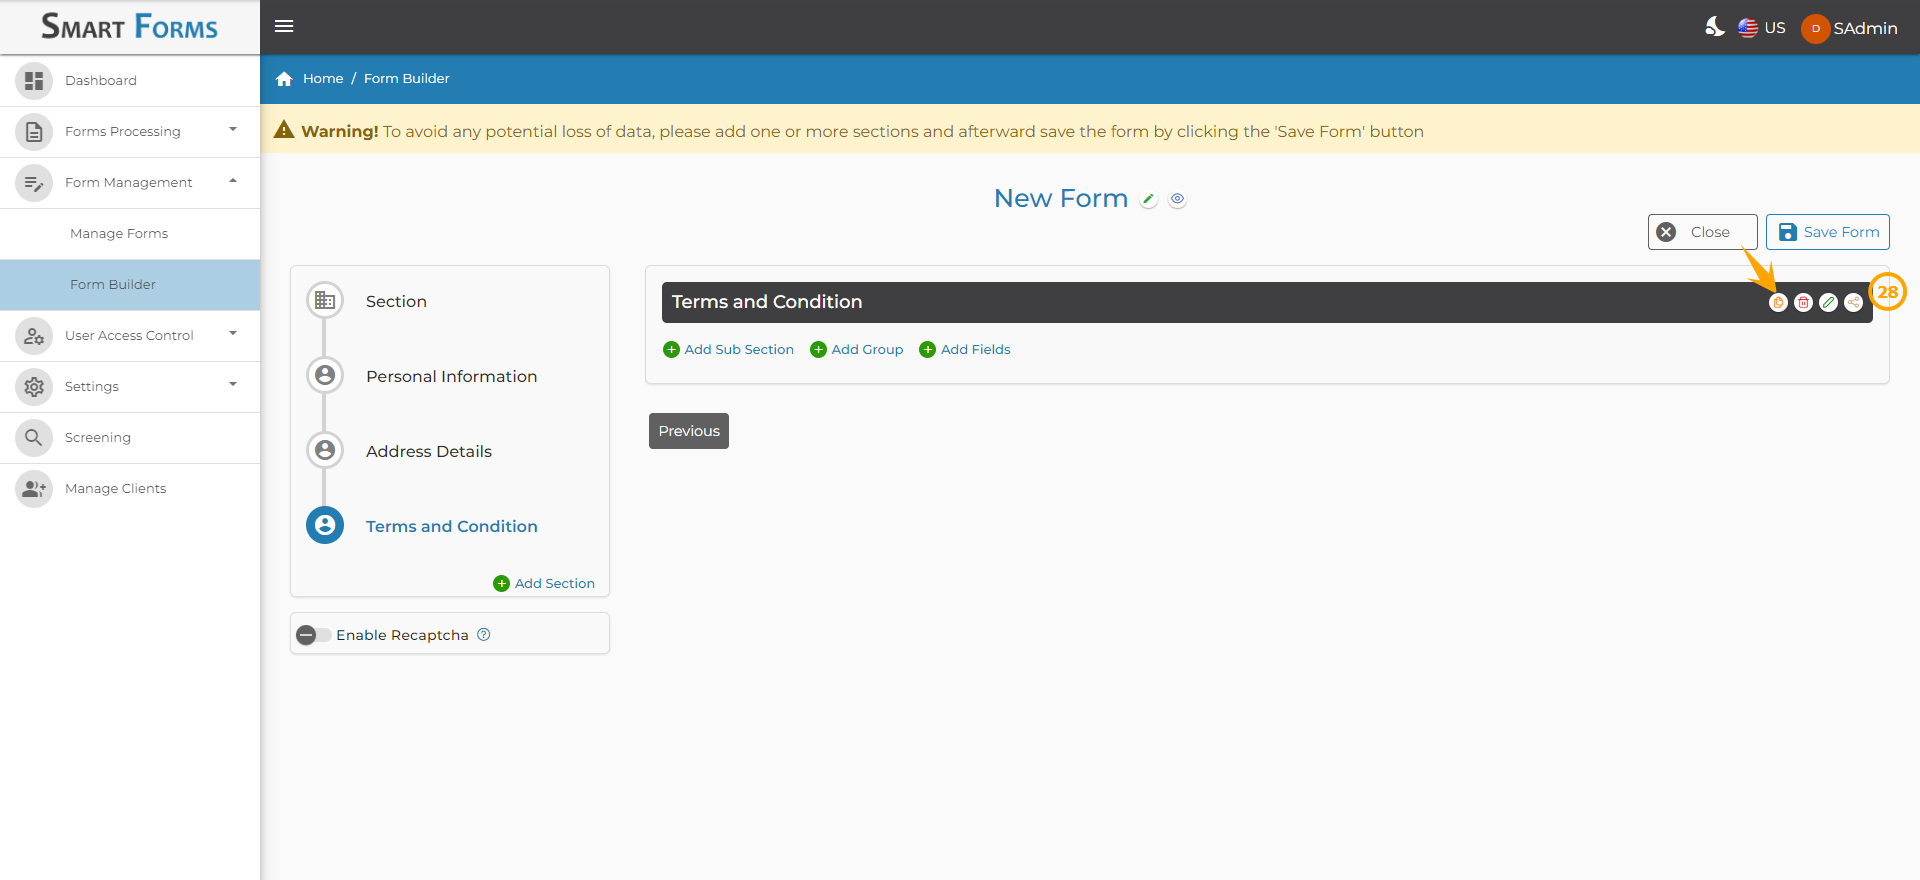
The section has been successfully copied.
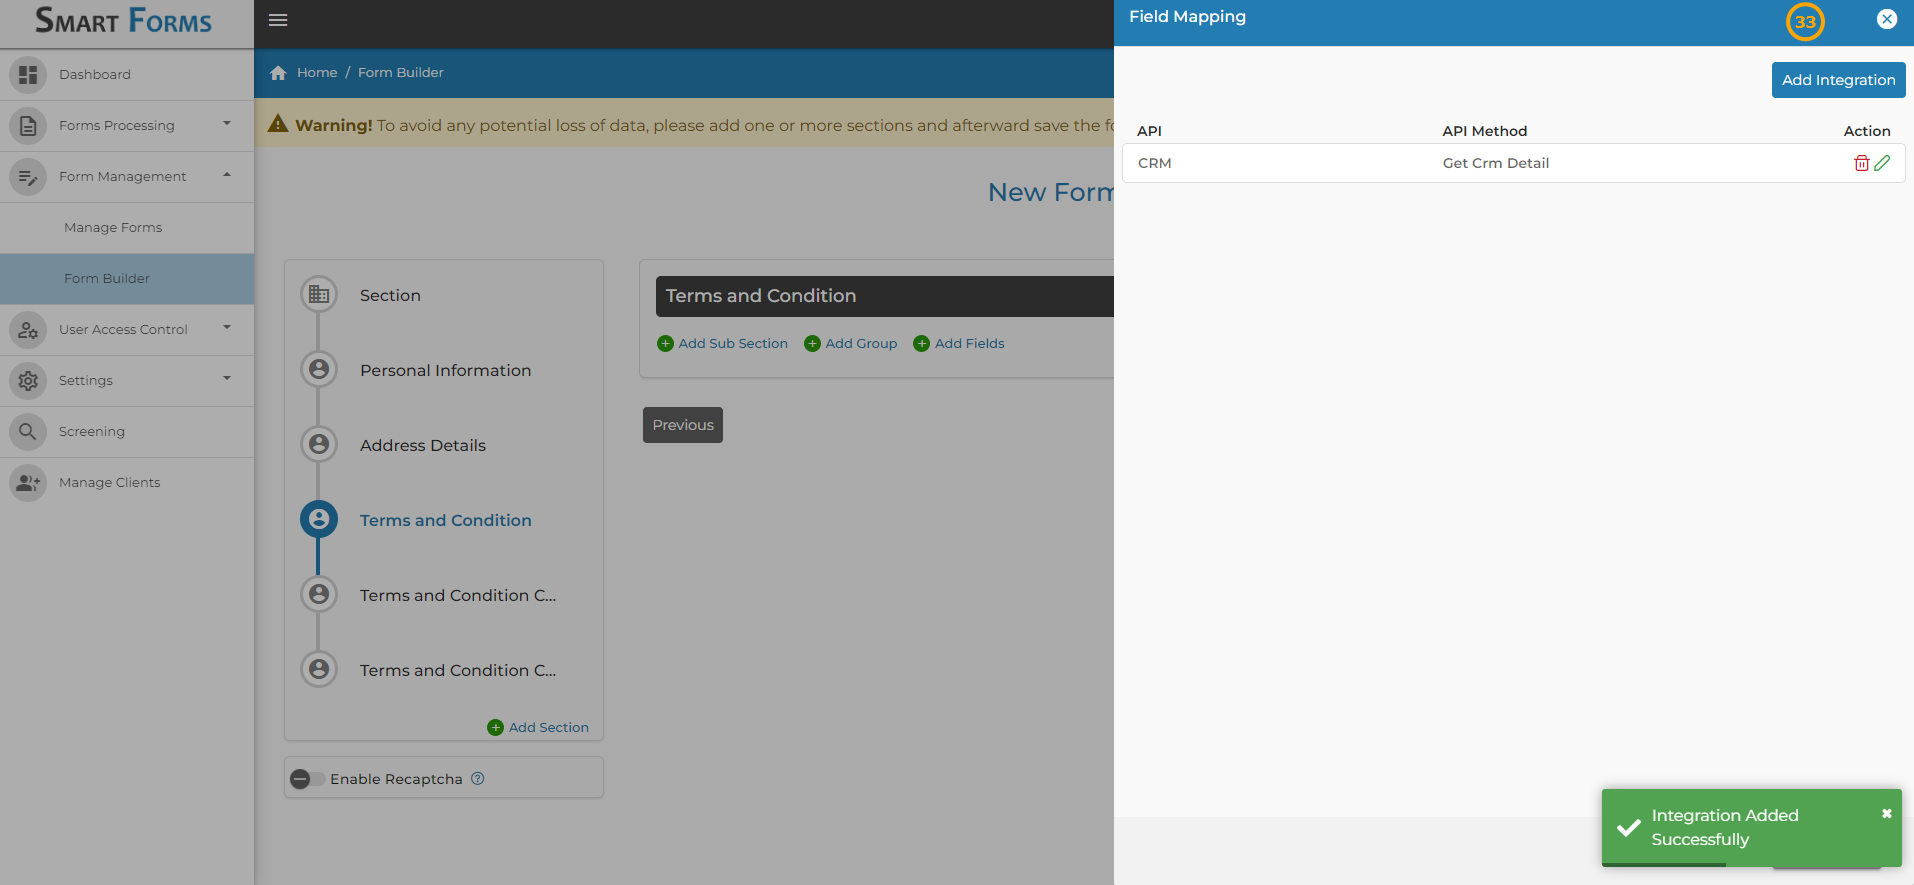
How to Perform CRM API Integration?
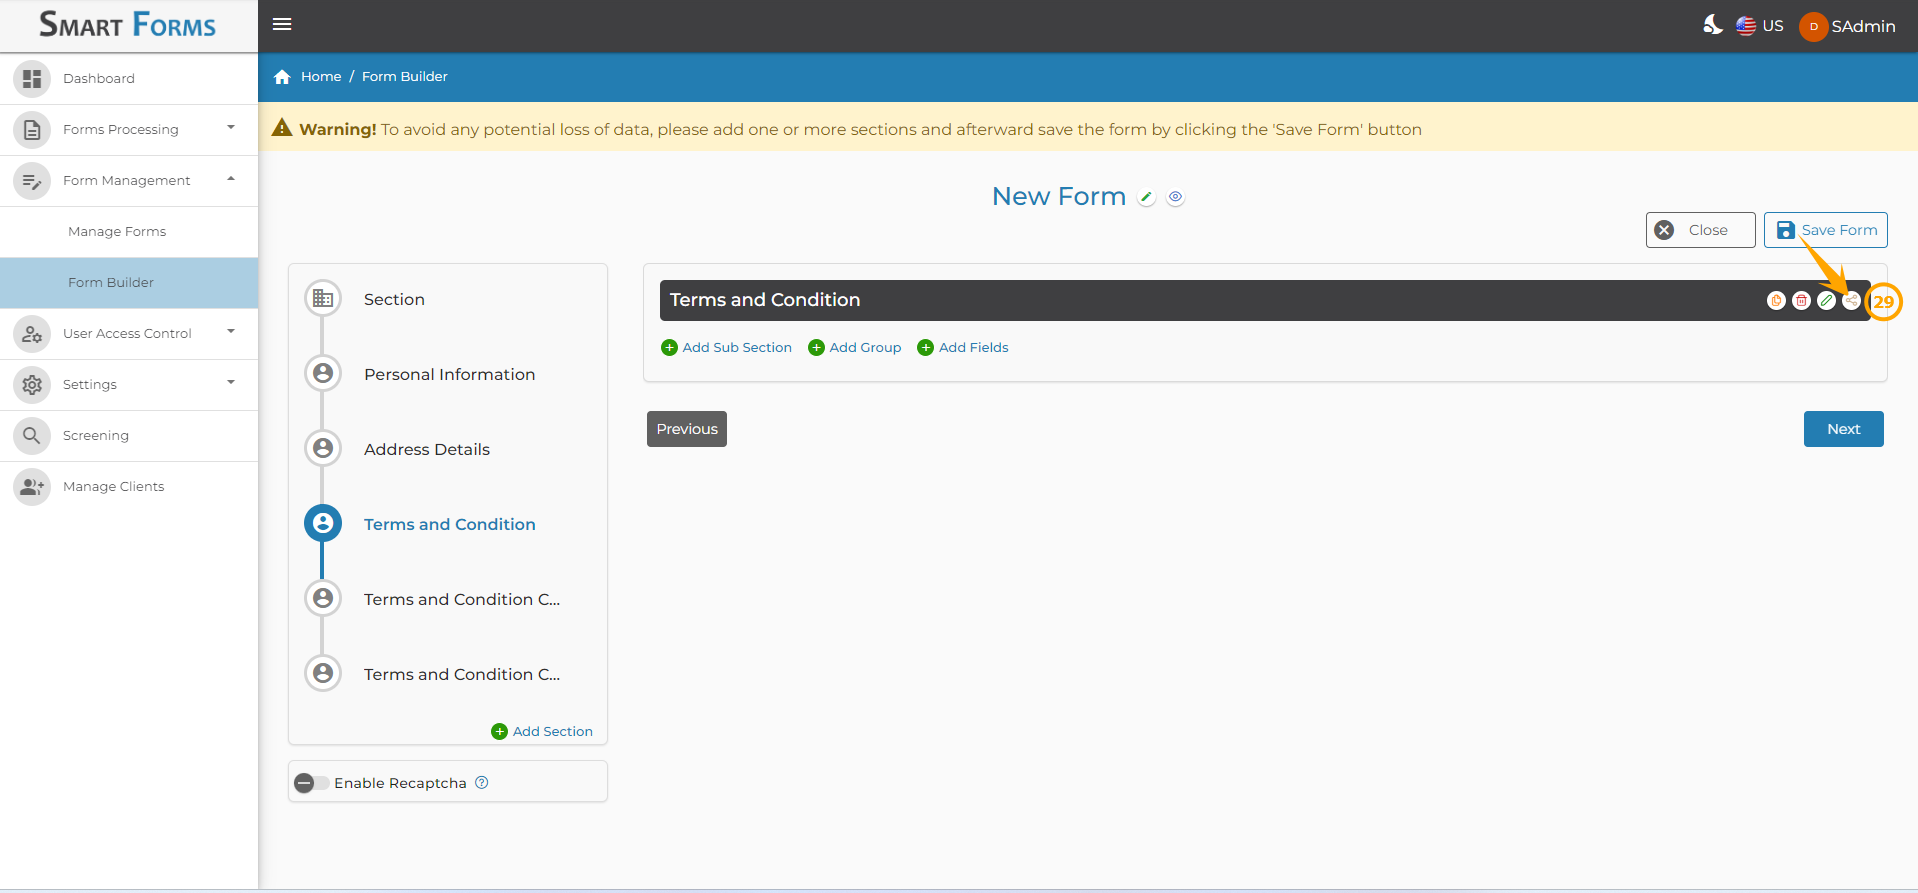
29: Locate the Field Mapping icon beside the section title and click it.
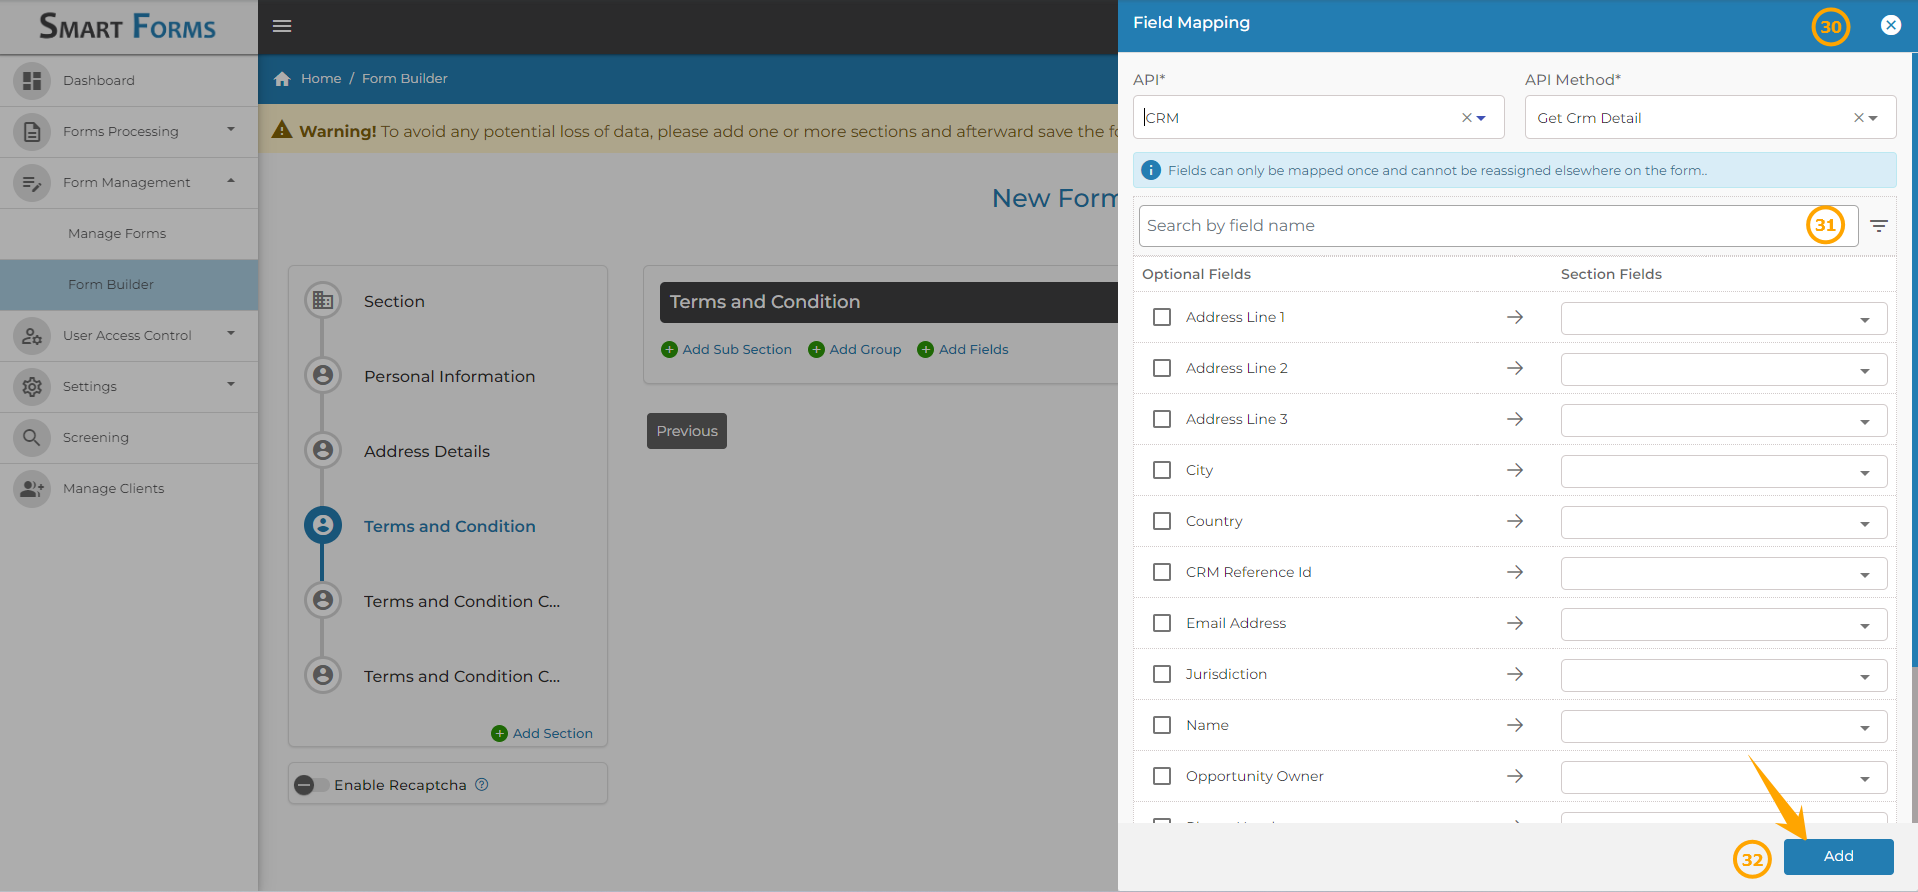
30: In the Field Mapping section:
Select the CRM API.
The API Method is automatically selected based on the chosen API.
31: The fields will appear after selecting the API and the API Method. At this stage, you need to map the corresponding fields.
If you select (check off) the API fields, you must manually specify the corresponding section fields. Alternatively, you can choose the section fields directly through search by field name.
32: Click Add to complete the mapping.
33: You have now successfully added an API integration. From this section, you can also Edit or Delete existing integrations.
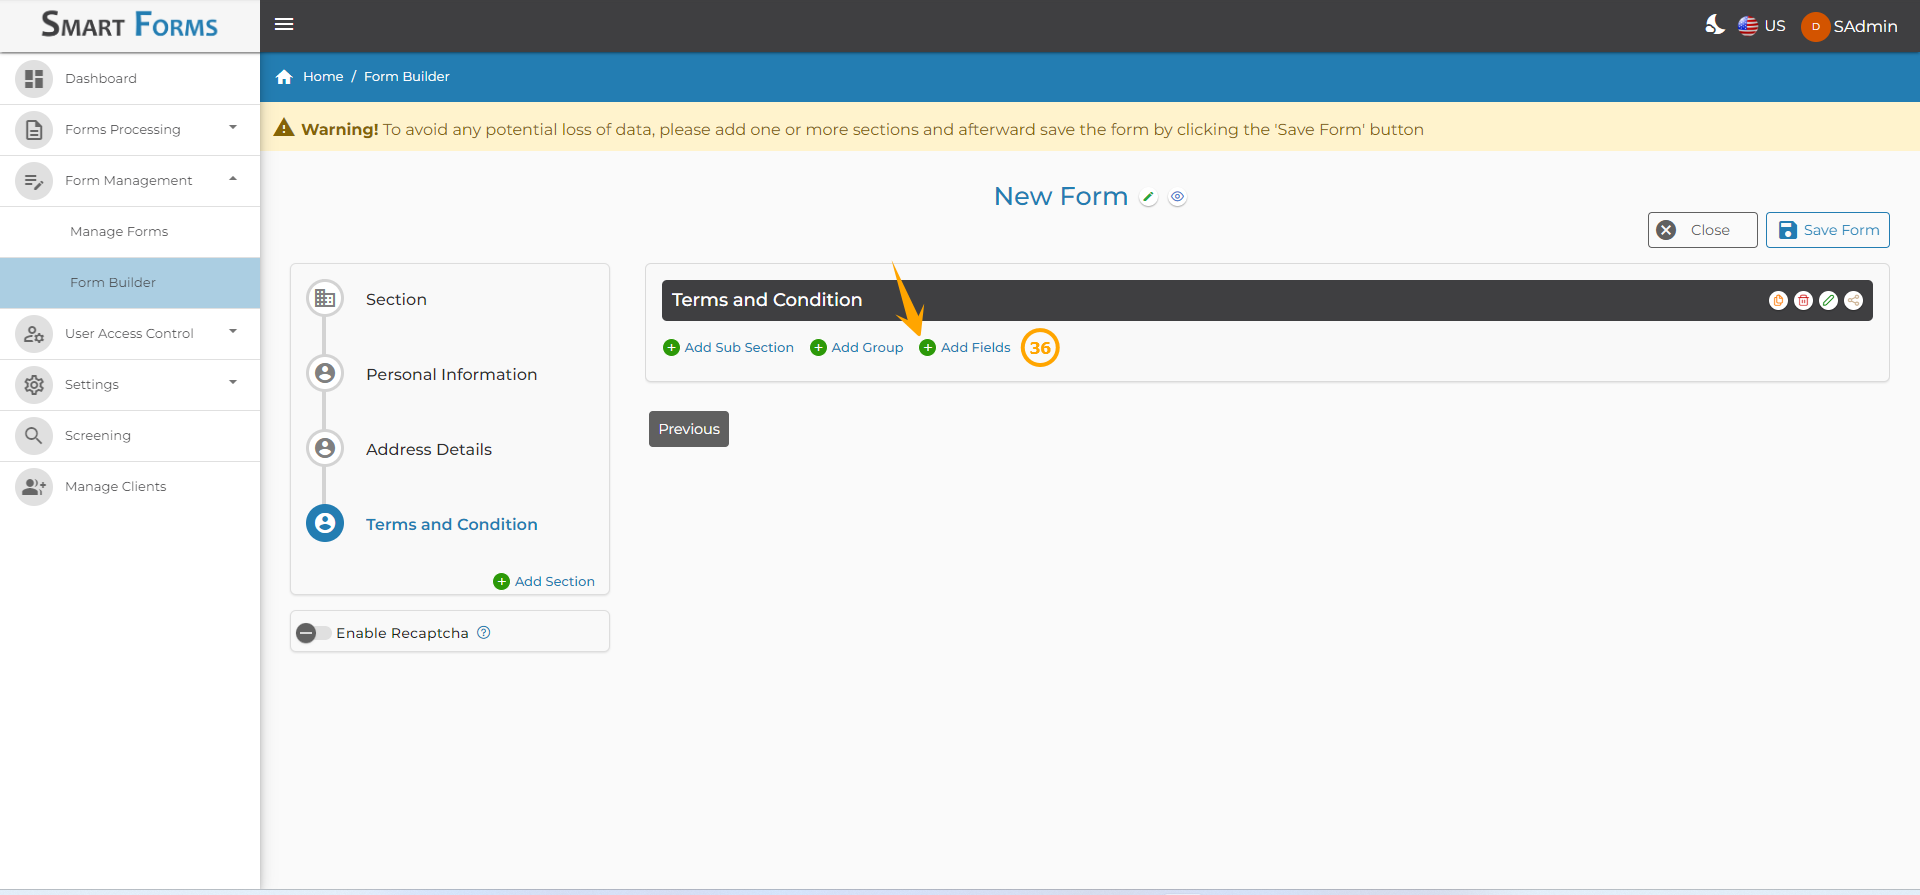
Adding Sub-Sections, Groups and Fields to the Section.
34: Click Add Sub Sections button to add sub-sections to the section.

35: Click Add Groups button to add a group to this section, you can then add the fields to the respective group too.
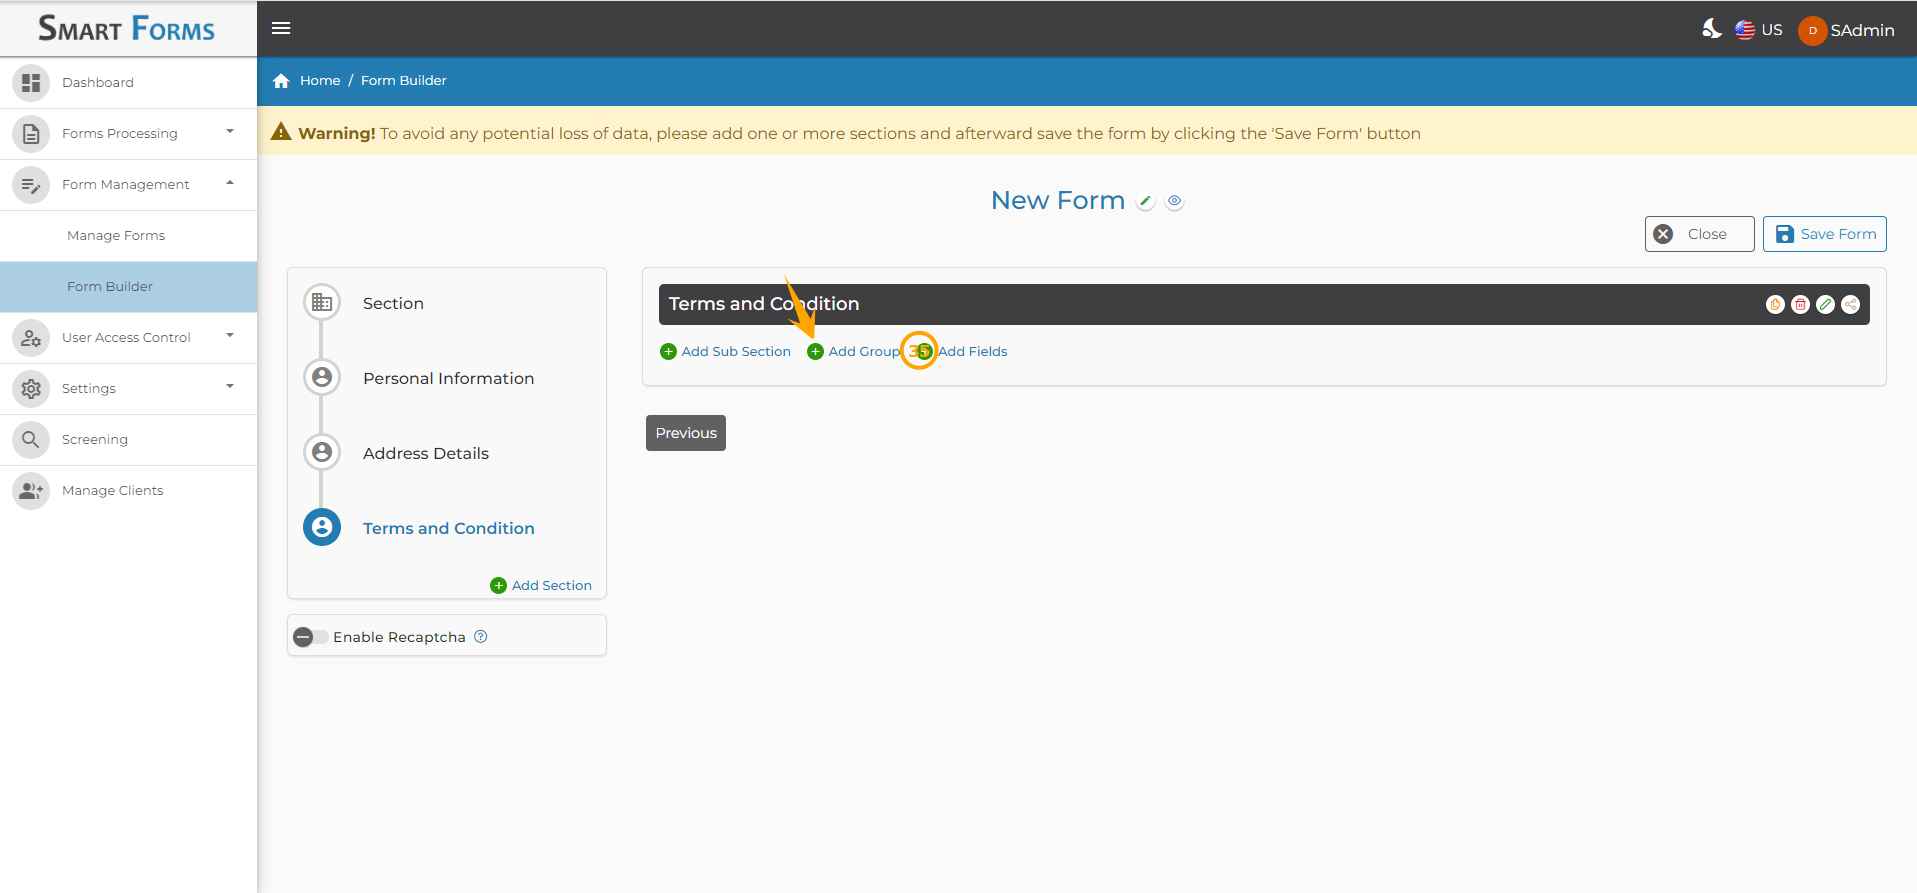
36: Click Add Fields button if you want to add the fields directly without adding the sub section or the group.
Updated about 12 hours ago